Wednesday 31 May 2017

Casualty markers

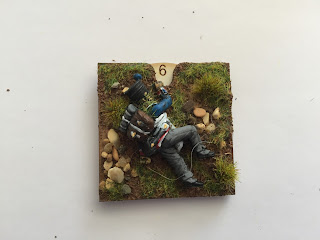
Well at our club we don't like stuff cluttering up the table. So instead of using dice to keep track of casualties we use casualty markers. Having said that they also need to blend in as much as possible. The solution of one of our members, Chris Johnson, was to cut a metal disc and stick a numbered disc on top with a small pin into the base which was then textured and a casualty figure added. 

Now handled badly these pins hurt!!  Chris suggested using my laser cutters to come up with something involving magnets and a strip of metal. This is the result. Now the originals went from 1-8 which was fine for Black Powder but don't go high enough for Picketts Charge/Gd'A etc etc. A disc up to 20 should cover most games i think. 

Anyway here is how to put them together.
4 pieces per marker with either 8 or 20 number disc.

At firs i superglued the metal piece over the hole but when it came to texturing the glue obviously didn't work on the metal. The simple solution was to stick it on with masking tape and once the pva glue is applied and texture added everything stays firmly where it's supposed to be. Superglue magnet to the middle of the disc.

Add texture of choice to match the way yo base figures.

Add more texture.

We normally add a casualty figure but anything can be used like shrubs, rocks, discarded weapons and equipment etc etc. Just let your imagination go here.


A finished infantry base


A selection of bases including double disc, cavalry, infantry and round versions. Discs can be green or white, particularly useful for the double bases.

Available on our website here-Casualty markers

Cheers
Mick

Tuesday 23 May 2017

AWI game

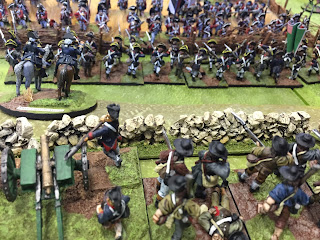
This scenario involved the Rebels holding the ridge on the right and protecting the two roads in order to enable their artillery to escape. To the rear of the ridege off table is heavily wooded terrain. The British task was to take the ridge while causing as much damage as possible to the American army.

We used Black Powder with club amendments.

British left, Americans right.


The American right advance to protect the road to their right as well as giving space behind for the withdrawal of the army by the road to the rear.


The British centre advances.


We put the command stand on the flank until the unit uses up its first fire when it is then moved to the centre,


A view from the American centre.

The Guards advance

Cavalry in support.


View from the British right

And from the American right

Daring advance by a small unit of American Dragoons.


From turn 2 each American brigade can throw to withdraw one unit  starting with a six and dropping one each turn. Cavalry also must leave by road.

The British advance continues

A quick start to the American withdrawal sees 3 units off by turn 3.

The British steadily advance on their left,

A gap where a unit has withdrawn,


American skirmishers pull back as the British centre advances.


The American right wing continues to thwart the British attempt to cut off the road over the river and threaten the road to the rear of the American right.


On the left the cavalry has fallen back after a failed attempt to take out a British unit in flank


As can be seen the American line has thinned out a bit following a series of successful withdrawal throws.

The right continues to hold


The Guards attack but their opponents are fresh Continentals


The British take the ridge vacated by American  cavalry and infantry on the lefr

British troops advance to cut off the American line of retreat


The Americans got all of their guns away and lost a couple of units. The British will occupy the ridge but failed to cause much damage to the Americans who largely escaped to fight another day.

Thanks for looking in.

Mick