
Battle of Plum Creek Fictional ACW Scenario between Union Forces and the British Intervention Force (with some Confederates thrown in too!)
The scenario, forces generator and amendments we use for ‘Pickett’s Charge’, particularly in fielding the BIF can be found in the files section of our club website under the Picketts charge section here: -
Border Reivers (The map referred to can be found here)
Geographic Objectives -There are 6 geographic objectives. The last units to move through or occupy the objective and having no enemy units within 6" control the objective when victory is determined. At the beginning of the game the Union is considered to control the 3 objectives on their side of the table and the Confederates/BIF the 3 objectives on theirs. The objectives along the Plum Road Pike are worth 2VP each for the Union force and 1VP each for the Confederate/BIF forces. The objectives behind the Union frontline (don't forget the Hill) are worth 2VP each for the Confederates/BIF and 1VP each for the Union. Thus, up to 9VP can be obtained by holding all objectives.
Casualties- Each Brigade which becomes ‘Tuckered Out’ (suffering more than 1⁄2 its strength – see amendments) yields 1VP to the enemy. Each Withdrawing Brigade yields 2 MPs to the enemy. Each ‘Catawamptiously Chewed Up’ brigade yields 3 MPs to the enemy. If the Union Balloon is destroyed or captured then the Confederates/BIF gain 1VP
Terrain -Plum Creek is fordable and classed as Rough Terrain. Rail Fences / walls are linear obstacles (Crossing Rail Fence/Stone Wall) and provide cover from small arms only. Woods/Orchards are open but also classed as ‘Rough Terrain’ The two farms have the ‘buildings’ modifier (see below).
Plum Road Pike
Rough Terrain- This will include woods, scrubland, shallow rivers and streams and rough or rocky slopes. It also includes built up areas such as farms and buildings. EFFECT
a. Close Order Infantry move at standard speed but will require a formation test every turn they move in such terrain. Test is not required by units in column of march.
b. Mounted Cavalry are reduced to half speed as soon as they enter such terrain and also require a Formation Test for each turn they move in such terrain.
c. Artillery are reduced to half speed as soon as they enter such terrain and also require a Formation Test for each turn they move in such terrain.
d. Artillery & Mounted Cavalry will continue to move at half speed until all figures in the unit clear the terrain.
e. Skirmishers, Generals and Retiring, Whipped or Routed troops are not affected.
Crossing Linear Obstacles (Walls and Rail Fences)
a. Close Order Infantry move at standard speeds (no movement is lost) when crossing over walls and fences but will require a Formation Test after crossing.
b. Skirmishers and generals are not affected.
c. Mounted cavalry lose half their move allowance crossing the obstacle and require a Formation Test.
d. Artillery lose half their move allowance crossing the obstacle and requires a Formation Test.
e. If units have insufficient movement allowance to cross such obstacles, then halt on reaching the obstacle and cross next turn. Buildings For game purposes all farms, settlements and towns are grouped into the one “buildings” category. Buildings are always classed as rough terrain and receive a -1 cover modifier from all fire. Any troop capacity is only limited by the actual size of the terrain area.
UNION BALLOON! The Union player has the use of a balloon which can be used to reveal the presence of enemy troops ‘off-table’ and concealed by Fog of War Cards or ‘Blinds’. The balloon can also help in bringing on friendly ‘off-table’ reserves. The balloon can be placed anywhere on the Union side of the table. It is assumed to be inflated and aloft at the start of the game. This balloon is operated like another brigade and requires successful command rolls to activate it each turn. Because balloons at this time were inherently unstable and difficult to deploy, ADCs cannot be used as ‘Brigade Attachment’ to re-roll commands for the balloon. A balloon ‘hesitant’ result is ignored when rolling for force initiative. When activated, the balloon can only carry out one task (see below) per turn.
Balloon Tasks Revealing Enemy ‘Fog of War’ Cards or ‘Blinds’ For this purpose, the balloon is used like the ‘Scout’ ADC tasking. Once per turn (if the balloon has an ‘obey orders’ command roll) the Union player can indicate the enemy fog of war card he wishes to be revealed and rolls one D6. The Union player can indicate any card to be scouted regardless of where the card is on the table top. A score of 4-6 reveals the card. A score of 1-3 fails. (If the card is within woods apply a -1 modifier to the die roll.) If successful the player may immediately remove the opposing player’s fog of war card and any concealed troops are placed on the table. (See Fog of War cards – PC-P24. Chapter 3.)
Revealing Enemy Off-Table Reserves When used for this task, the player controlling the balloon points to the enemy left flank, centre or right flank and asks if there are any off-table reserves due to be deployed in that area. He then rolls 1xD6. On the score of 4-6 the opposing player must indicate to the balloon commander the forces that are due to be committed in that area (the number of regiments/units/batteries plus or minus up to 1xD6 margin of error). The opposing side need not reveal the number of brigades. On a 1-3 the observation has been unsuccessful.
Committing an Off-Table Reserve When activated, the balloon helps to bring on any friendly off-table reserve forces by reducing the number of ADCs required for the task from 2 to 1. The balloon does not help with committing on-table reserves however.
Targeting the Balloon The Confederate/BIF player can assign one or more artillery batteries with an ADC tasking (one ADC) to shoot at the balloon. Such batteries cannot shoot at any other target unless it is is in close range, the balloon is forced down or another ADC tasking releases the battery from that purpose. Small arms fire has no effect on a balloon.
The balloon is always a long-range target and carries a -2 modifier because of the difficulties it would be to hit. Breech-loaded rifled field pieces do not get the ‘effective range’ modifier at long range when firing at a balloon. To force the balloon down the artillery battery must score an ‘Elephant Test’ result. No need to roll on the ‘Elephant Test’ table. Any casualties or ‘hits’ on the balloon are ignored.
A ‘Forced Down’ balloon is treated like a ‘faltering brigade’ and rolls as a ‘Regular Unit’ on the ‘Faltering Brigade’ table next turn. A faltering balloon does not require a staff-officer to shore-up divisional morale, nor does it effect other brigades.
Obey Orders = Balloon returns to observation duties again next turn. Hesitant = Balloon is distracted / forced down / winched down and cannot observe this turn. Will need to roll for command next turn to remove the hesitant marker. ADCs cannot be used to re-roll balloon command. Withdraw = Balloon is damaged and out of action. It withdraws from the field. Catawamptiously Chewed Up! = Balloon is completely destroyed (1VP for the Confederate/BIF side).
The Union player can voluntarily withdraw the balloon from the battlefield. If he does so then it is removed from the table and cannot return. If the balloon position is overrun by the enemy then it is immediately considered captured and the Confederates/BIF gain 1VP.
DEPLOYMENT Union Deployment The Union player sets up first with two of his four brigades. His deployment area can be anywhere up to halfway into the table. The other two brigades must be ‘off-table’ reserves. Confederate/BIF Deployment The Confederate player can start 12” in from his starting edge of the table. He must deploy two of his five brigades on the table at the start of the game. The other three brigades must be brought on as ‘off-table’ reserves. Cavalry Brigades Both sides have the option to distribute their cavalry among the infantry brigades or organise it into one brigade. If brigaded together then the cavalry form an extra brigade (over and above the 4 [Union] or 5 [Confederate] infantry brigades). FOG OF WAR - BLINDS Blinds can be used as per the rules (PC-P24) if any players wish.

Blinds for 2 brigades per side were laid out, Union top, BIF/Confederates at the bottom.


All troops are deployed when within 20 inches of the enemy.

The British commander is particularly eager to 'get stuck in'.


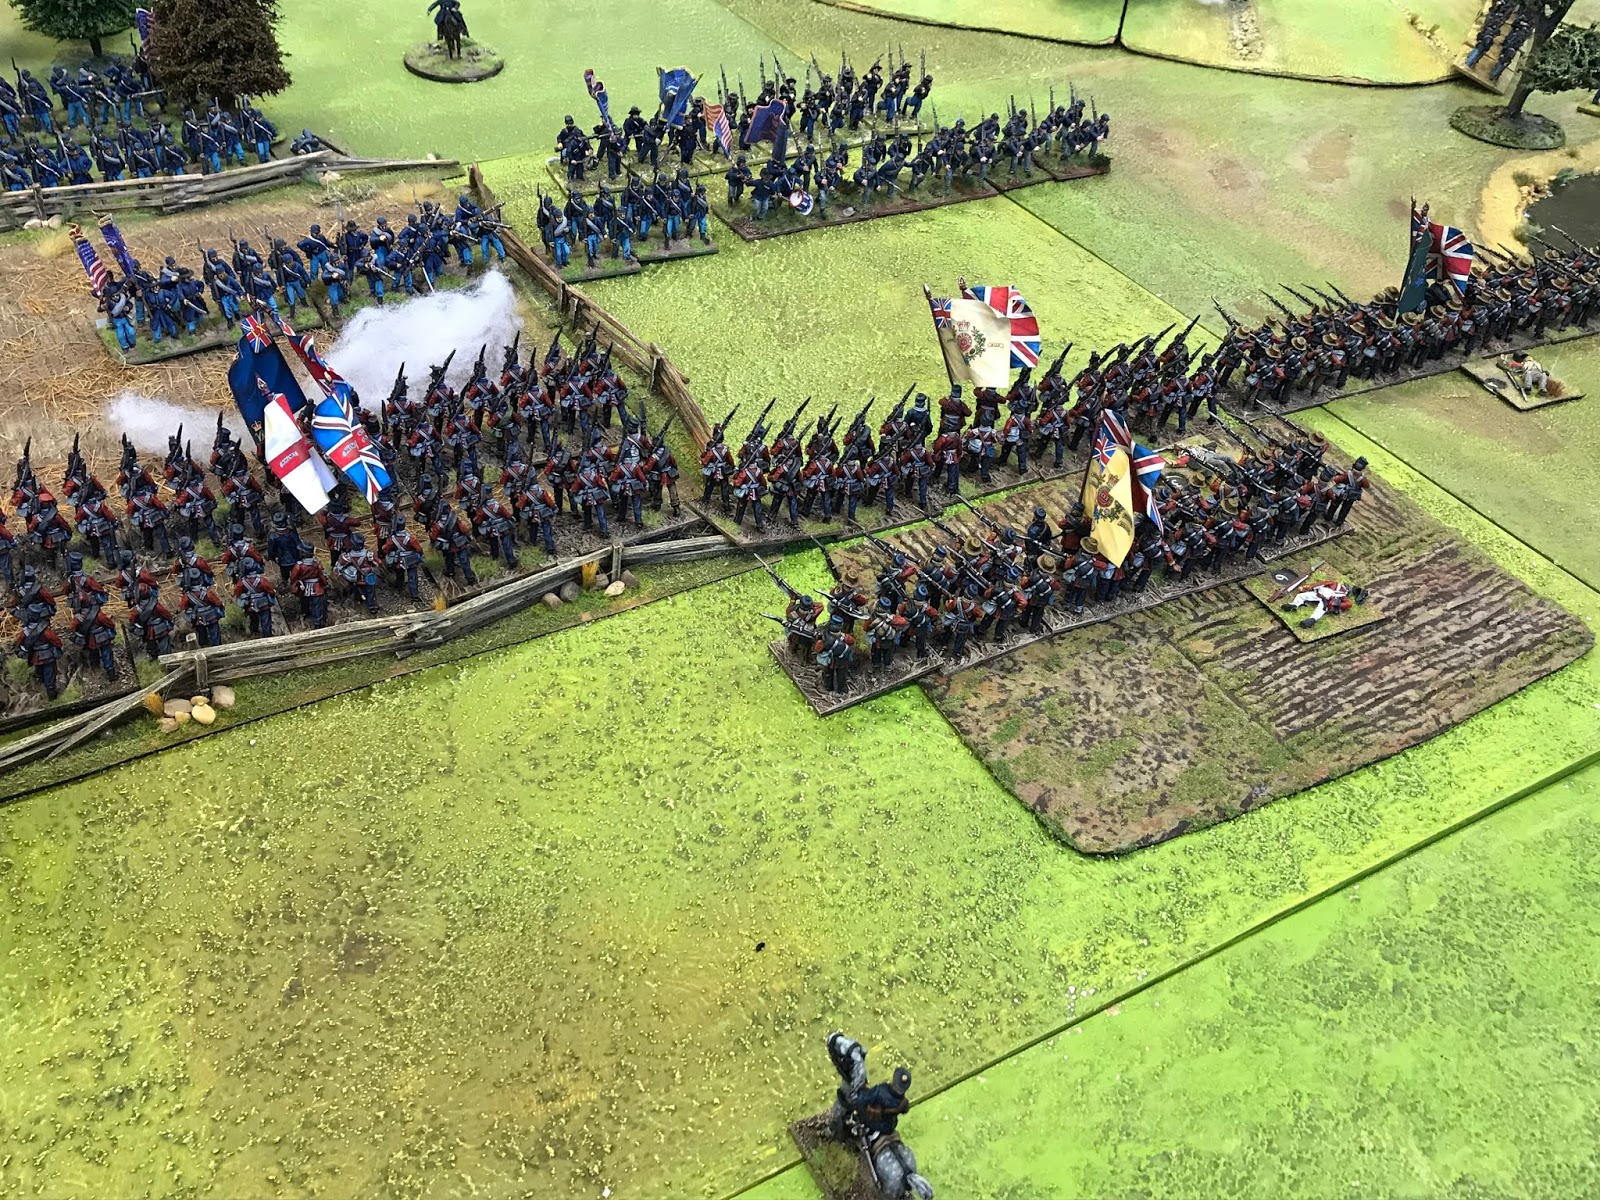
The British open fire and inflict the first casualties.

The Union return fire and cause the first casualties on the British. The darker cotton wool represents fire discipine resulting from the dice throws

View from the gondola.

The British charge home

and are forced to withdraw behind their own lines

while to their left a Confederate brigade marches onto the field.


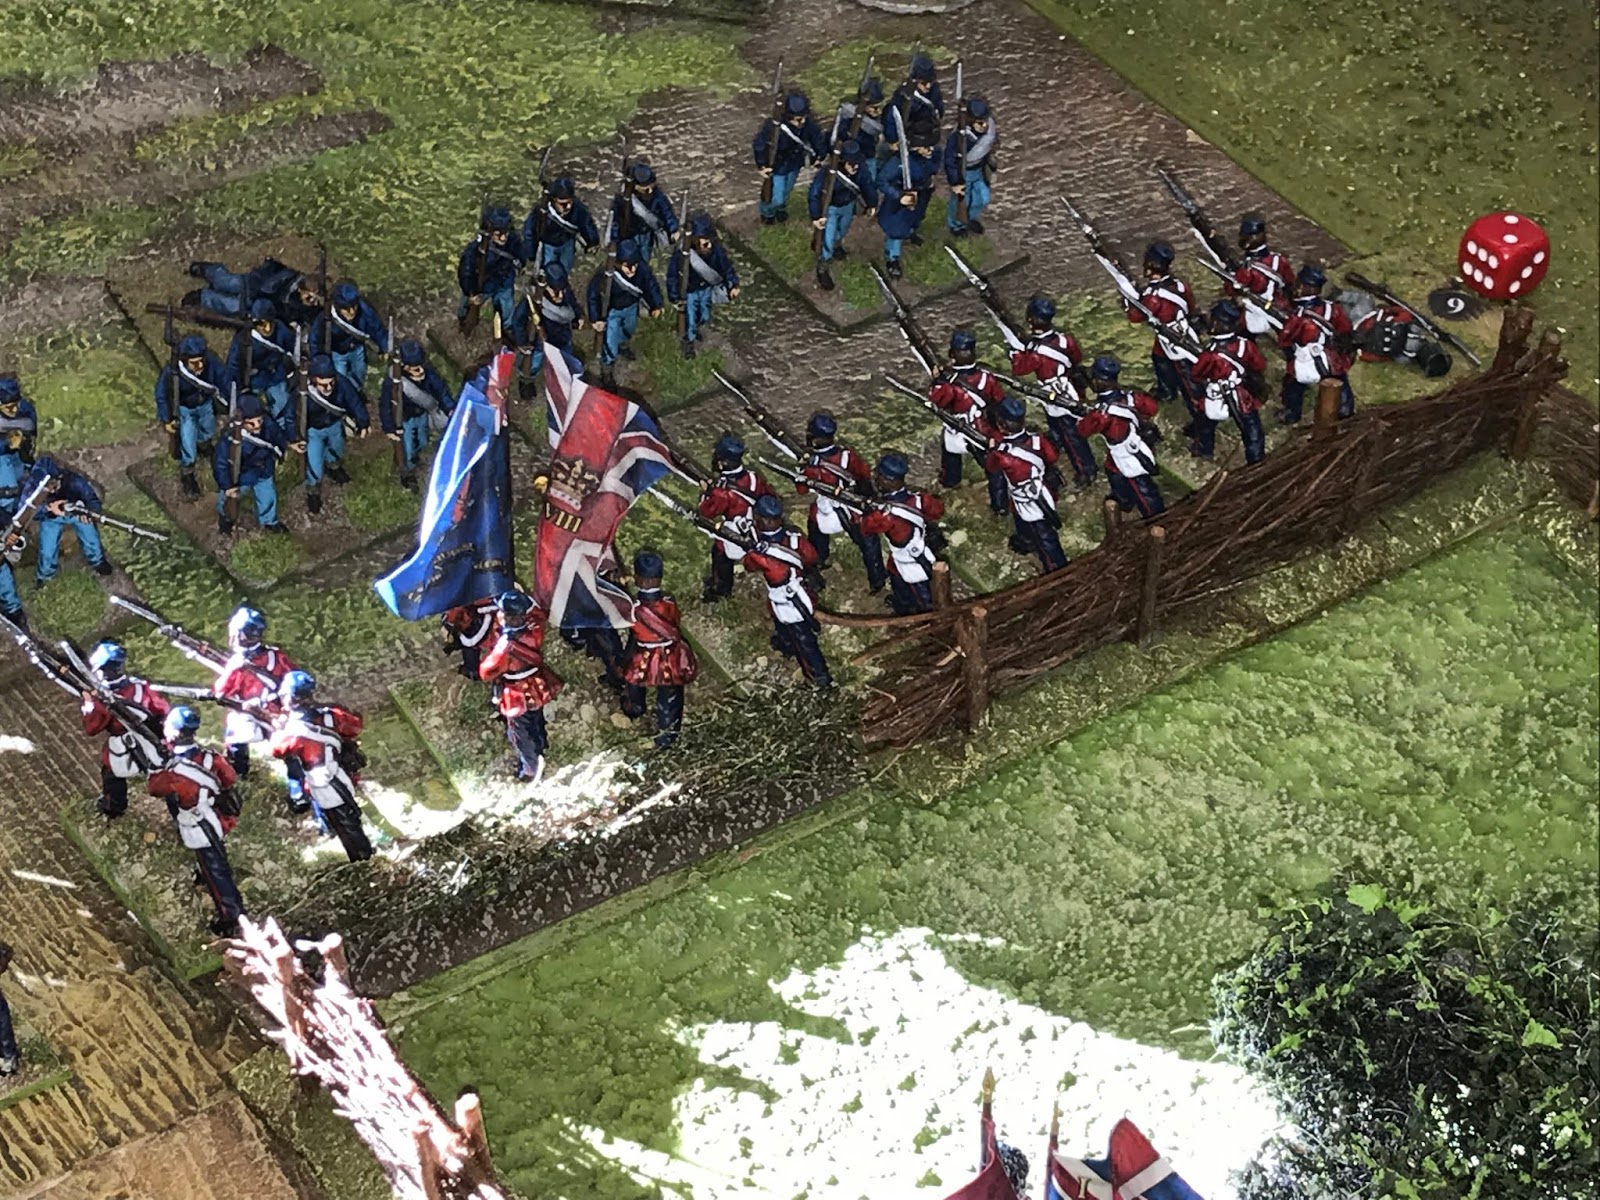
The British artillery prepare to fire.

The combined firepower sees off a Union regiment behing the fence.

Skirmishers face off on the left flank

with artillery support for the Confederates.

More Union troops march toward the front lines.

The Union brigade lining the fence line withdraws under pressure from the British.


Union reinforcements advance down the road.

Confederate and Union engage near the wood,

Fire from this battery cleared the wood of Union troops.

Over on the laft flank of the Confederat and British line reinforcements arrive.

A firefight between the British and Union lines begins.

whipe a Confederate brigade advance to the left trying to turn the Union left.


Following British charges

The Union Brigade falters and withdraws as a Britsh regiment also falls back.

On the left the as yet unidentified Confederate reinforcemts continue to advance with Union troops also entering the battle.

The British Guards arrive.

The Union are starting to look a bit thin on the ground over on the right,

with the Confederates continuing to advance by the river.

The British advance into the field.

Over on the left the Confederates begin a general advance.


Union skirmishers engage the Guards Brigade

The other British brigade is pushed back out of the fied.


and continues to withdraw.


In the centre the skirmishers engage

and the British are pushed back.


Infantry reinforcements having been revealed a mixed cavalry brigade arrives

while to the right of this Confederates continue to advance.


On the Union right Confederat troops have advanced through the woods to wait for their cavalry support to arrive as protection agains the Union cavalry.

3 Confederate and British brigades advance on the left facing 2 Union.

At this point we ran out of time

All looking a bit sparse here with both sides having withdrawn exhausted. At great cost the British had seen off 2 Brigades.

Confederat troops advancing on the right wing.

The victory points were totalled up and gave a clear victory to the Confederates and British. It would have been interesting to play an extra couple of rounds to see if the Union could have recovered the situation. Many of the fresh Confederates were poor quality troops and the Union had some relatively unscathed units.
A smashing days gaming even though i didn't throw any dice until about 3pm and when i did,not a single 6 in about 25 dice!!!
Cheers
Mick
No comments:
Post a Comment